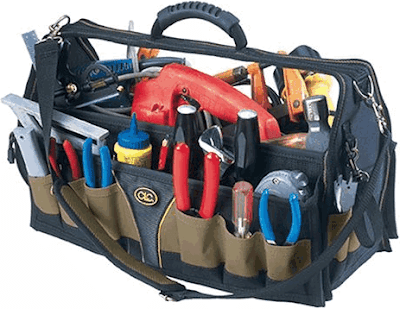
The source it came from was a .jpg file, which are small in size, but also contain a lot of noise.
To see this, we can use the editing tools within Irfanview, which are enabled from the edit menu by picking Show Paint Dialogue. This adds a small toolbar like the one on the left.
This has a lot of tools for editing the image, but the one we are interested in is the fill tool. This is the one highlighted in the example. It looks like a paint can being tipped over with pant pouring out and is the 6th icon down in the left column.
We also want to use a bright colour to see the difference. To change the colour, click on the box at the bottom - the one that is already orange in the example - and select Orange.
Also click the one that is grey in the example and change that to white.
These two boxes represent the foreground colour and the background colour. When we use the tool in a moment, we tell it which to use by which mouse button we press.
Left mouse button for foreground, Right mouse button for background.
We are going to use the fill tool to fill the area around the toolbox in orange.
What this will do is look at the colour where we click, and fill that pixel (screen dot) and all the pixels around it that are a similar colour with orange.
How similar the colour has to be is decided by the tolerance, which in the example is set to 5. A higher number means it is more tolerant of the difference and so a greater range of colours will be changed. For now leave it at five - or set it to five if it is different.
Then, using the left mouse button (to indicate foreground colour), click in the white area around the toolbox image.
Here I have clicked in the lower right corner, so it has filled as far as it can and though it looked like there was a gap all the way around the image, the fill couldn't get through. Lets see that close up.
The thing to notice here is the frilly white edge around the toolbox. This is Jpeg Noise, it is where the colour is not quite as white as the rest of the background. We want to get rid of this as much as possible.
Now using the right mouse button, click again in the same place and it will fill the same area in in the background colour. To get rid of the noise, we need to increase the tolerance.
- Increase the tolerance value by 5.
- First with the left button - to fill in orange
- Check the amount of noise
- Click with the right button - to put it back to white
If the orange starts to bleed into the toolbox image, you have increased the tolerance too much and need to start again.
Once you have reached the right value, use the right button to set it back to white.
We now need to do a single pass of left button / right button fill in all the transparent areas, such as under the handle and between the tools. Be careful not to to this to areas which are part of the tools themselves, we are only removing noise from transparent areas.
Be careful here though because in this image there is an orange tool, so we need to change from orange to another colour to clear the area around this.
As I said a while back, Magenta is a common colour for such things.
Once they have been cleared and put back to white, go back and change them all to magenta again - this will be our transparency colour.
Then re-save the image in the artwork folder - use a different name such as Toolbox Source 2.png , in case you later find you need to go back.
This might seem like a lot of back and forth just to do one image of what could be hundreds of images, but after a little practice, you will be able to zip through them in no time at all.


No comments:
Post a Comment